Settings in the "Performance Tile" widget
![]()
Alternatively, you can use the "Settings" command in the widget menu.
In the "Settings" dialogue window, you can first select the area on the left side for which you want to configure your settings:
"General" area
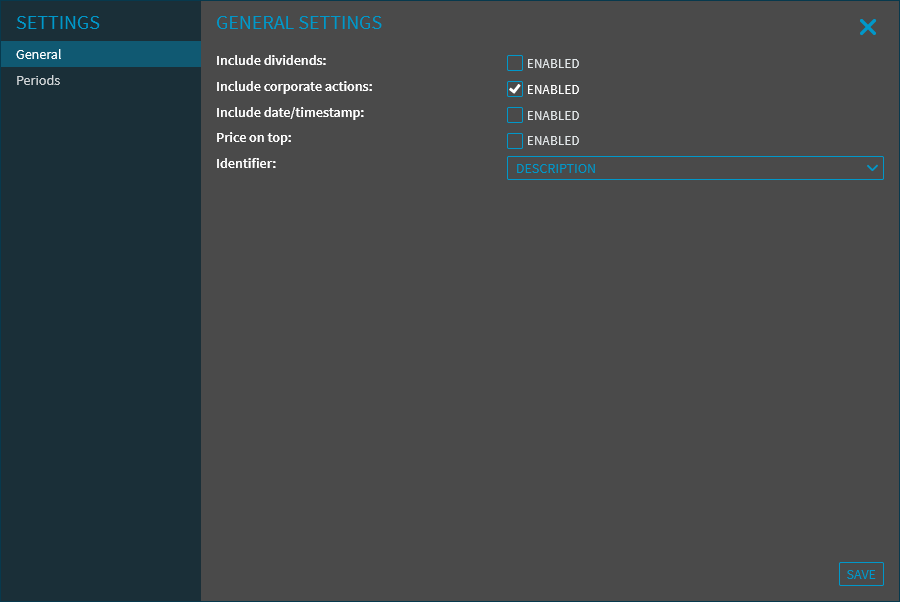
In the "General" area, you can make the following settings:
| Field | Description |
|---|---|
| Include dividends | Select this checkbox, which is selected by default, if dividends are to be taken into account when calculating the prices shown. |
| Include corporate actions | Clear this checkbox, which is selected by default, if corporate actions are not to be taken into account when calculating the prices shown. |
| Show date/time | Select this checkbox, which is cleared by default, if you also want the quote date or time to be displayed at the bottom of the Mini Quote in the case of daily updated values. |
| Highlight price | If you select this checkbox, which is cleared by default, the rate is highlighted instead of the percentage change.
|
| Identifier | Select here which information is to be displayed under the security name. The following values are available:
|

Example: Mini Quote with displayed price date

"Periods" area
In the "Periods" area, you have the option to add individual periods to the "Performance Tile" for the performance calculation.

To do this, follow these steps:
- On the left side of the "Settings" dialogue window, select the "Periods" area.
- Then select the "Add period" button on the right side of the dialogue window.
- You can then enter the corresponding name for the first individual period in the "Name" input field. However, this name can also be generated automatically (see the following table with the settings).
- Then click the "Settings" button for this period.
- Configure the new time period. The table below contains descriptions of the individual setting options.
- Then click the "Save" button. (Use the "Back" button to close the settings for the period without saving any changes you may have made).
- If you want to add further periods, then select the "Add period" button in the "Periods" area and proceed in the same way.
You can delete your own time periods by clicking the corresponding "Delete" buttons.
The settings of the individual periods in detail:
| General | |
|---|---|
| Field | Description |
| Name | Enter the relevant name for the period here. You can freely define the name of a period - or leave it blank for the time being and use the automatic name generation. The name is then automatically generated by the system according to the time periods you set and other parameters of the performance calculation. The name of the period can be changed later. |
| Automatic naming | Select this setting to automatically generate the name of the period. The name is generate depending on the time periods and start and end times set below. |
| Selected period | Here, you can see the always updated period of the performance calculation resulting from your settings. This data is not editable here. To set the calculation period, it is recommended to first define the methodology for the end date (Absolute date, Now, Relative to...). Then do the same for the start date. In the "Selected time period" row, you will then see the start and end date that results from the respective parameter selection. |
| Select start date | |
| Field | Description |
| Date from | Here, you can set a fixed starting date. To do this, select this check box and then enter the corresponding start date using the calendar integrated into the input field. The default setting is 1 month into the past. |
| Relative | Here, you can set a relative starting date. To do this, select this checkbox and then select the relevant starting time from the drop-down list. The following entries are available:
|
| Period starting from the end date | Here, you have the option to define a calculation period starting from the end date. To do this, select this checkbox and then first select the relevant period from the drop-down list and then enter the relevant number in the input field. The following periods are available:
The default setting is 1 months. |
| Select end time | |
| Field | Description |
| Date to | Here, you can set a fixed end date. To do this, select this check box and then enter the corresponding end date using the calendar integrated into the input field. The current date is set by default. |
| Now | Here, you have the option of setting the current date as the end date (default setting). Select this checkbox. |
| Relative period starting from the end date | Here, you can set the date to the desired end time relative to a date in the past. To do this, select this checkbox and first select an end date from the upper list. The following entries are available:
You can then select the period and enter the corresponding number in the input field. The following periods are available:
Example In August 2021, the setting "End of previous quarter" and "2 months" result in the end date "April 30, 2021". |
Example: Period selection with individual period
![]()
